How to Professionally Install a Refrigerator Water Line with the Right Connector
Connecting a refrigerator to a water supply is a critical task in ensuring reliable performance of its built-in ice maker and water dispenser. A proper installation not only guarantees consistent water flow but also prevents leaks and potential water damage. This guide provides a technical overview of how to install a refrigerator water line, including the proper use of a refrigerator water line connector.
Materials and Tools Required
Before beginning the installation, ensure you have the following:
Refrigerator water line connector (typically 1/4 inch compression fitting)
1/4 inch copper tubing or braided stainless steel supply line
Saddle valve or tee valve with a shut-off
PTFE thread seal tape (Teflon tape)
Adjustable wrench
Drill (if tapping into cabinet or wall)
Tube cutter (for copper lines)
Step-by-Step Guide to Install Refrigerator Water Line
Step 1: Identify a Suitable Cold Water Source
Locate a nearby cold water supply line — usually under the kitchen sink or in the basement. You will need to tap into this line using a saddle valve or tee valve. A dedicated shut-off valve is strongly recommended for maintenance and safety.
Step 2: Install the Shut-off Valve
If your plumbing does not already have a tee or valve for refrigerator connection, install one:
For copper plumbing, use a tee compression fitting or solder a branch line.
For PEX or CPVC, use push-fit connectors.
Ensure the valve has a 1/4 inch outlet to match your refrigerator water line connector.
Step 3: Run the Supply Line
Use either copper tubing or a flexible braided stainless steel line to connect the valve to the refrigerator. Avoid vinyl or plastic tubing, which can degrade over time or burst under pressure.
Secure the tubing along the back wall using clamps. Keep the line short and straight to avoid kinks or flow restrictions.
Step 4: Connect to the Refrigerator
Attach the supply line to the refrigerator’s water inlet (usually at the bottom rear):
Use a 1/4 inch compression-type refrigerator water line connector to attach the tubing.
Apply Teflon tape to the male threads before tightening to ensure a watertight seal.
Do not overtighten — compression fittings seal with moderate torque.
Step 5: Flush and Test the Line
After all connections are secured:
Turn on the shut-off valve slowly.
Check for leaks at all joints.
Run the water dispenser or ice maker for several minutes to flush air and debris from the line.
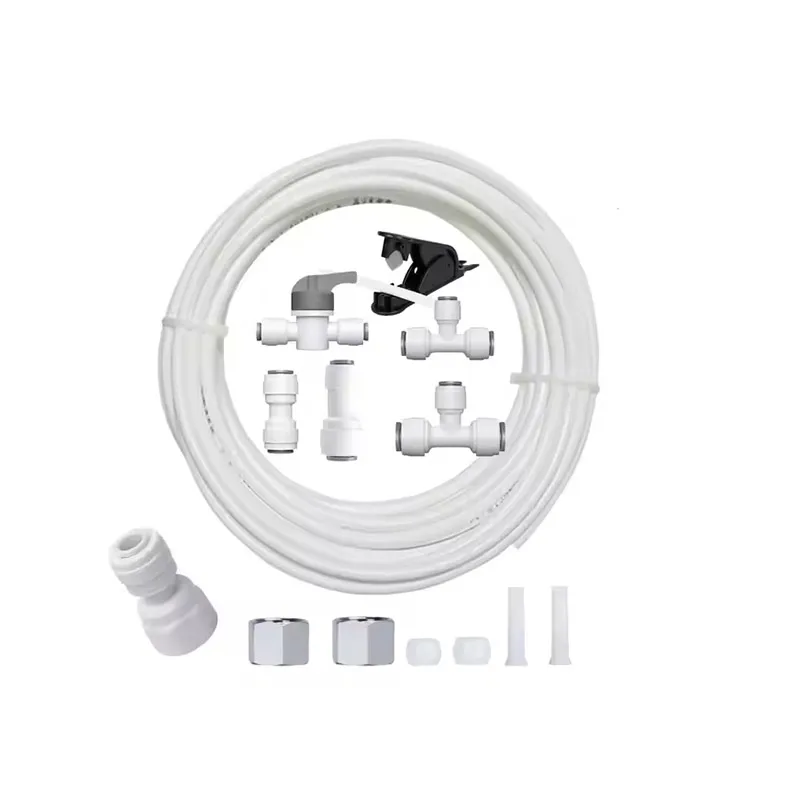
Understanding the Refrigerator Water Line Connector
A refrigerator water line connector is typically a 1/4 inch compression fitting made of brass or stainless steel. It provides a secure, leak-free seal between the supply line and the refrigerator’s water inlet. Depending on the installation configuration, the connector may also include:
Elbow fittings (for tight space installation)
Quick-connect push fittings (for tool-free setup)
Dual-connector adapters (for shared water lines with dishwashers)
Always ensure the connector is certified for potable water and rated for at least 125 PSI working pressure.
Installation Best Practices
Avoid saddle valves in modern installations. They are easy to install but prone to leaks over time. Use tee or angle valves instead.
Use braided stainless steel or copper lines for durability and reliability.
Do not install refrigerator water lines behind walls unless they are rated for concealed use and meet local plumbing codes.
Maintenance Tips
Inspect connectors annually for signs of corrosion or leaks.
Replace any tubing older than 5 to 10 years, especially plastic lines.
If the refrigerator is relocated, always reinstall the line using a new compression ferrule and sleeve for leak prevention.
A successful and leak-free refrigerator water connection relies on both proper technique and the right components. By using a certified refrigerator water line connector and following professional installation standards, you ensure safe and reliable performance of your appliance. Whether you are upgrading an old water line or installing a new fridge, taking a technical approach to how you install refrigerator water line is key to long-term peace of mind.
FAQ
1. What is the best type of refrigerator water line to install?
The best option is a braided stainless steel supply line or a 1/4 inch copper tube. These materials are durable, pressure-resistant, and suitable for long-term use. Avoid plastic or vinyl tubing, as they can become brittle over time.
2. Do I need a specific connector to install a refrigerator water line?
Yes. A refrigerator water line connector, usually a 1/4 inch compression fitting, is required to securely attach the supply line to the refrigerator’s inlet. Some models may also require elbow connectors or push-fit adapters depending on the available space.
3. Can I install a refrigerator water line myself?
Yes, many homeowners can install a refrigerator water line with basic plumbing tools. However, for complex connections (such as cutting into copper pipes or installing shut-off valves), hiring a licensed plumber is recommended to avoid leaks or code violations.
4. How tight should I make the water line connector?
Tighten the compression fitting until it is snug, then apply an extra quarter-turn. Over-tightening can damage the ferrule or cause leaks. If using a push-to-connect type, ensure it is fully seated and locked in place.
5. What should I do if the refrigerator water line is leaking?
First, turn off the water supply. Check if the connector is cross-threaded or if the tubing is cracked. Reinstall the connector with new ferrules if necessary. If the leak persists, replace the line or consult a professional plumber.
6. How long does a refrigerator water line last?
A properly installed copper or stainless steel water line can last over 10 years. It is a good practice to inspect the line annually and replace it every 5 to 10 years to prevent leaks, especially if using plastic tubing.
7. Can I use a saddle valve for the water connection?
Saddle valves are still used but are not recommended by most plumbing codes due to their tendency to fail over time. It is better to use a tee valve with a dedicated shut-off for a more reliable and code-compliant installation.
916.webp)
204.webp)
659.webp)
185.webp)
312.webp)
849.webp)
587.webp)
767.webp)