482.webp)
Plastic water pipes are widely used in residential plumbing, agricultural irrigation, and industrial piping systems due to their corrosion resistance, light weight, and ease of installation. Whether you're dealing with PVC, HDPE, PPR, or PEX materials, knowing how to connect them properly is essential for leak-free and long-lasting performance. A critical component in these systems is plastic pipe fittings, which provide versatile and reliable solutions for joining, redirecting, and terminating pipe runs.
Common Types of Plastic Water Pipes
Commonly used in residential cold-water and drainage systems. It's easy to glue and works well with a wide range of plastic fittings.
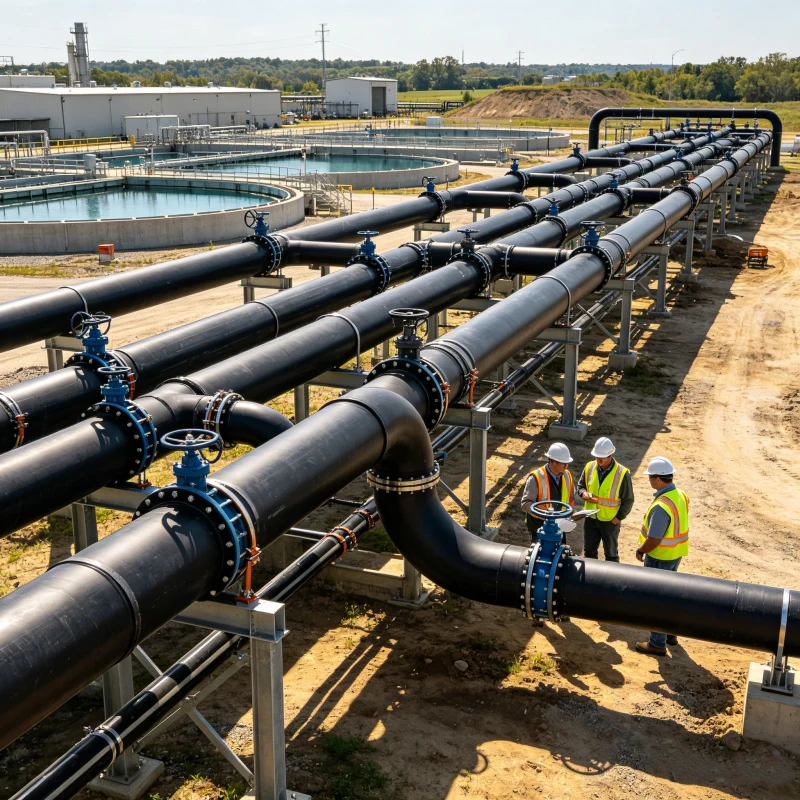
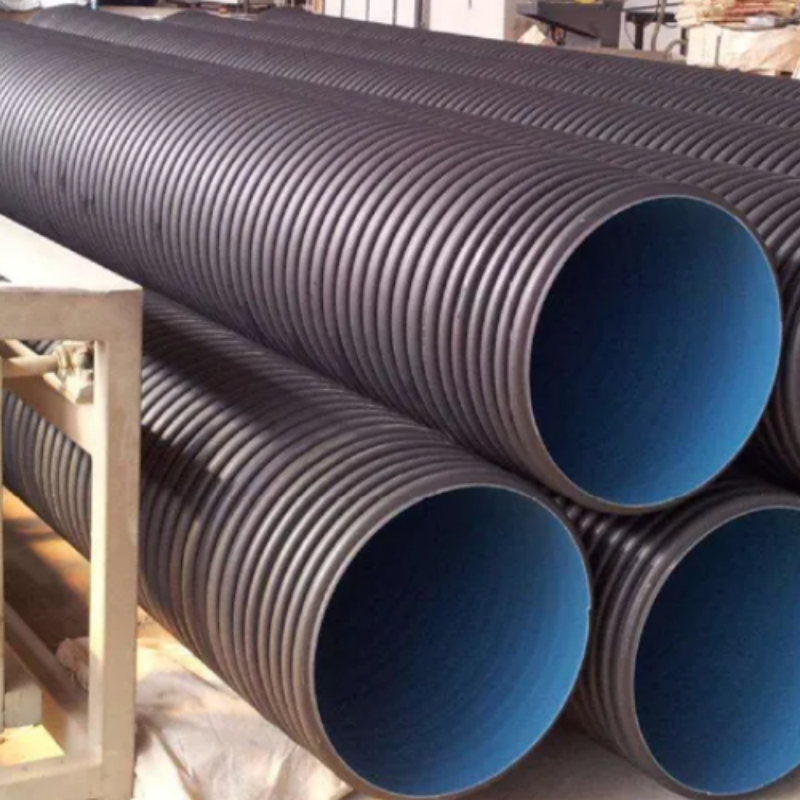
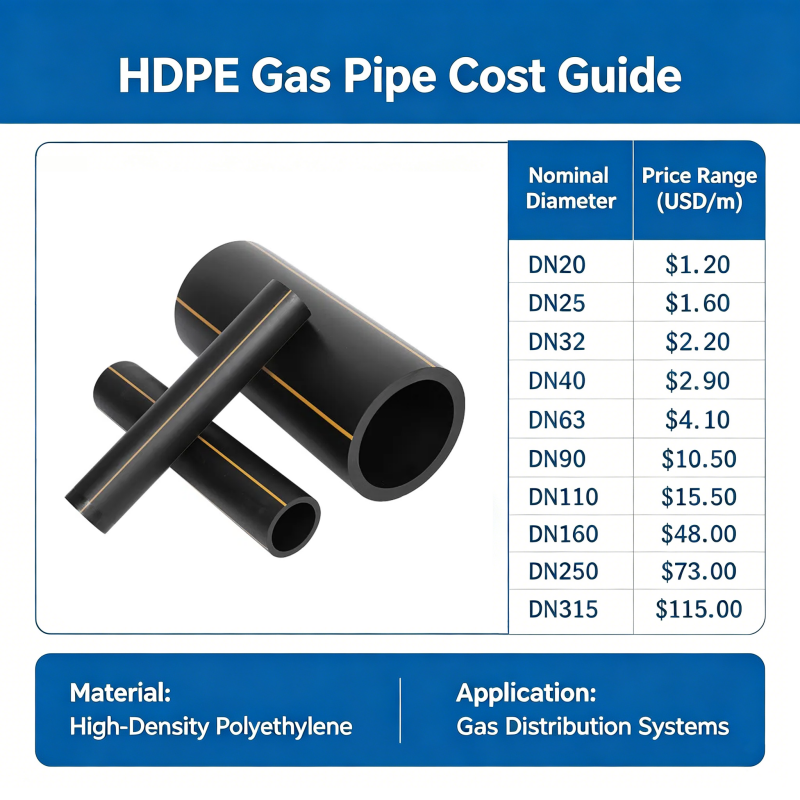
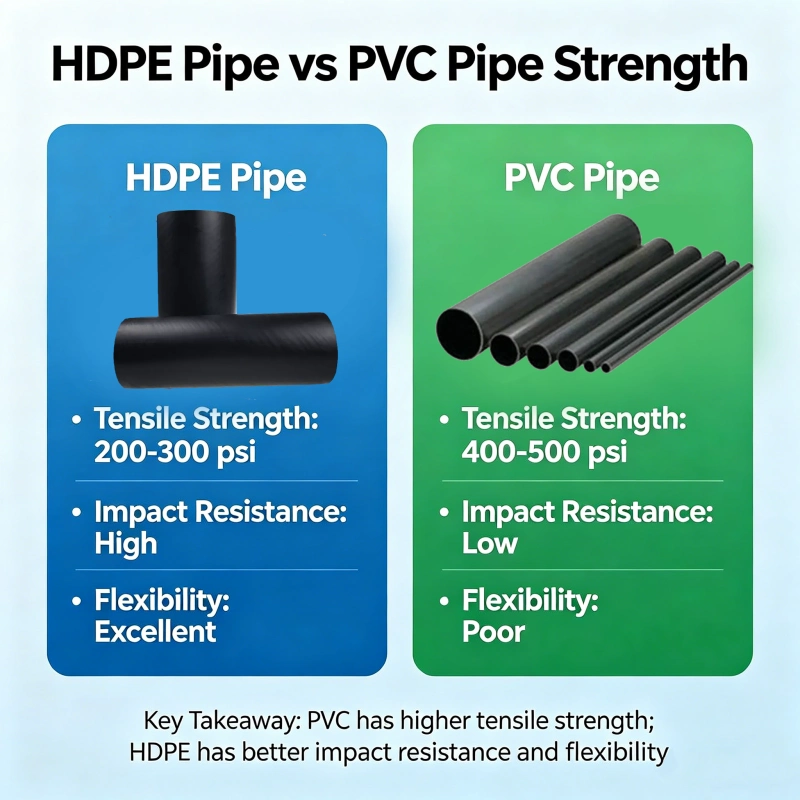
2. HDPE (High-Density Polyethylene)
Known for its flexibility and high impact resistance. It’s widely used in municipal water systems and agricultural irrigation.
3. PEX (Cross-linked Polyethylene)
Flexible and heat-resistant, ideal for indoor hot and cold water plumbing systems.
4. PPR (Polypropylene Random Copolymer)
Typically used in pressurized hot water systems and buildings.
Each pipe type requires specific fittings and connection methods, making it important to select compatible components.
Types of Plastic Pipe Fittings and Their Uses
Couplings / Joiners: Connect two straight sections of pipe.
Elbows (90°/45°): Allow for directional changes in the pipe route.
Tees / Crosses: Facilitate branching pipe systems.
Adapters (Threaded / Slip): Transition between different pipe ends or materials.
End Caps and Valves: Seal off a line or control water flow.
These fittings are available in solvent-weld, threaded, compression, and electrofusion variants, depending on the connection method and pipe type.
Connection Methods for Plastic Water Pipes
A. Solvent Welding (Glue Connection) – For PVC/CPVC
This is the most common method for rigid plastic pipes.
Steps
Cut the pipe square and deburr.
Clean both the pipe and fitting with primer or cleaner.
Apply solvent cement evenly to both surfaces.
Push and hold together for 30 seconds.
Let cure before pressure testing.
Pros: Strong, permanent, leak-proof
Cons: Not reusable; cannot be used on HDPE or PEX
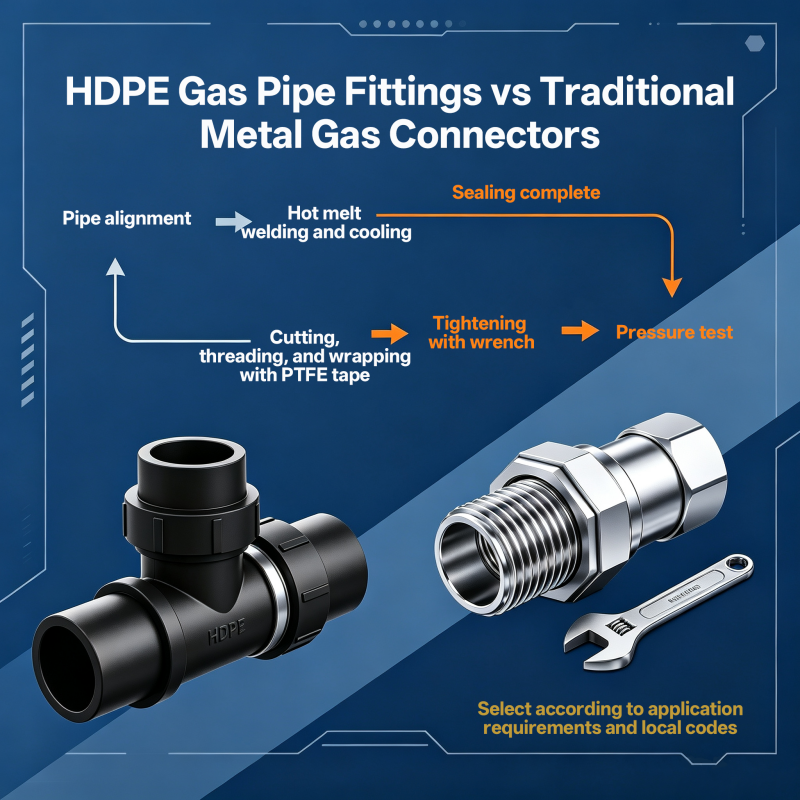
B. Mechanical Fittings (Compression / Threaded)
Used with PVC, HDPE, and PPR where disassembly may be needed.
Steps
Insert pipe into fitting body with or without rubber sealing rings.
Tighten compression nut or threaded section.
Test for leaks after full installation.
Pros: Quick to install, no heat needed
Cons: Slightly bulkier, requires occasional re-tightening
C. Electrofusion / Butt Fusion – For HDPE Pipes
Industrial method requiring special welding tools.
Steps (Electrofusion)
Clean and align the pipe ends inside the fitting.
Apply voltage through embedded wires in the fitting.
Wait for melt and fusion to cool.
Steps (Butt Fusion)
Heat the pipe ends with a hot plate.
Press them together under controlled pressure.
Let them cool to form a single continuous pipe.
Pros: High strength, ideal for high-pressure and buried applications
Cons: Requires trained personnel and equipment
D. Push-Fit / Snap-On Fittings – For PEX & Light-Duty Systems
Great for DIY and residential use.
Steps
Cut pipe to length and insert directly into fitting until it clicks.
Ensure secure engagement by checking indicator rings (on some brands).
Pros: Fast and easy
Cons: More expensive, not for high-pressure lines
Step-by-Step Installation Guide
1. Prepare Tools
Pipe cutter, deburring tool, glue or fusion machine, measuring tape
2. Cut and Clean
Always cut pipes squarely and clean contact areas thoroughly.
3. Attach Fittings
Use the appropriate fitting for your connection method (solvent weld, threaded, etc.).
4. Align and Join
Make sure the pipe is fully seated and properly aligned.
5. Pressure Test
Conduct a pressure or leak test before burying or concealing the system.
Tips and Common Mistakes to Avoid
Always match fitting type and pipe material (e.g., HDPE with HDPE fittings).
Don’t overtighten threaded or compression fittings.
Allow sufficient curing time when using solvent cement.
Never mix different plastic types unless designed for it.
Support pipes adequately to prevent stress on joints.
Connecting plastic water pipes efficiently depends on choosing the right pipe material, compatible plastic pipe fittings, and a suitable joining method. Whether you’re installing a household plumbing system or a large-scale irrigation network, following proper procedures ensures long-term performance and leak-free reliability. Always refer to manufacturer instructions and applicable standards to get the best results.
FAQ
1. What is the easiest way to connect plastic water pipes at home?
The simplest method is using push-fit fittings, especially for PEX or small-diameter plastic pipes. They require no tools, glue, or heat and are ideal for quick DIY installations.
2. Can I connect different types of plastic pipes together?
Generally, different plastics (like PVC and HDPE) should not be directly connected unless using special transition fittings designed for that purpose. Mixing incompatible materials can lead to leaks or failure.
3. Do I need to use glue when connecting plastic pipes?
It depends on the pipe type. PVC and CPVC typically require solvent cement (glue), while HDPE pipes use fusion welding or compression fittings. PEX often uses push-fit or crimp fittings.
4. What are plastic pipe fittings made of?
Plastic fittings are commonly made from the same material as the pipe—PVC, HDPE, PPR, or PEX—to ensure chemical and mechanical compatibility. Some fittings may also include rubber seals or metal threads for special connections.
5. How do I prevent leaks in plastic water pipe joints?
Make sure the pipe and fittings are clean and properly cut.
Use the correct joining method (glue, thread sealant, or fusion).
Avoid over-tightening.
Perform a pressure test after installation to confirm seal integrity.
916.webp)
204.webp)
659.webp)
185.webp)
312.webp)
849.webp)
587.webp)
767.webp)